Saturday, January 26, 2013

Exhaust Fabrication, Part 2 (December 27 - 30, 2012)


Exhaust Part 2:  Tailpipes

In "kit form," the tailpipes are designed for the stock leaf spring rear set up. Since we are running the DSE Quadralink, set up modifications are necessary (ahhhh, hot rodding by definition-right?) The tailpipes are designed to kick outwards right from the mufflers. In my case the track bar mounts and coilovers are located in that path. I wanted to keep the tailpipe exit locations as designed so that means some redirecting between the muffs and the final tailpipe location.


Tailpipes as received


First cut to re-clock straight back instead of outwards.


Next I added a 90 degree bend to kick outboard (the pieces below sticking upwards)   


Next I fabbed up these hanger mounts. In these pics they are temporarily held in place with a small Tek screw. The final install used 2 rivet nuts inserted into the frame rails.


The hangers use a clamp as part of the assembly. You will see later that I trimmed the clamp portion down and welded them to the tailpipe for a cleaner look.


Trimming the tailpipe portion to the correct dimension. Again, I used my Port-a-band for all of the cuts. Then I squared the ends on the stationary disc sander. All of the joints fit nice enough that no filler rod was needed for the welds.


Next I added 2 smaller bends to each side to connect to the tailpipe sections.


Trimming the ends of the tailpipes


I wanted the tips to extend about 1/4" below the quarter panel pinch weld.


Fitting the trimmed down clamp to the tailpipe.


Nice! Don't even see the hangers.


Finished product


These are the left over drops from the kit and 6 pieces that I bought to supplement the kit. 


We kept a log and I had 66 hours in the exhaust. There are 23 separate pieces (including the x-pipe). Before the final install I will brush all of the welds. I want to thank Terry at ABT welding for his patience and welding skills. It is awesome to watch a skilled welder perform his craft. This guy welds as easily as most of us walk! I learned alot. (I can TIG but no where near good enough for this project...yes I am envious of his skills!). All in all I am really happy with the final product. It is a shame that it is on the bottom of the car! I won't be shy about telling anyone to take a peek underneath!


Wednesday, January 23, 2013

Exhaust Fabrication, Part 1 (November 20 - December 26, 2012)


After lots and lots of thought, I decided to build my own exhaust system from 3" mandrel bent stainless. With the DSE Quadralink rear suspension, the option of any off the shelf "kit" was non-existent. I did suggest to DSE that they digitize the exhaust from their projects. They advised that they have had this under consideration but haven't gone forward. Another story for another day.... I started with a Stainless Works 3" system for a 67 with an LS engine. By the time I finished, not much of the kit was left intact, well actually none of it in it's original form except for the x-pipe! I did buy a few pieces with specific angles to supplement what I used from the kit. The rest of the bends came from dissecting the kit parts. I am going to break up the post into two parts, first from the headers to the mufflers. And the second part will be the tailpipes.

So here is the short play by play. 

Began at the headers with a V-band clamp to match the header collectors.  Note: at this point I re-fabbed the trans crossmember for more clearance.


Next located the x-pipe on a stand to facilitate the "connect the dots" approach.


1st bend in the front of the x-pipe


Sizing up the next piece


Used the trusty Port-a-band (still looking for a good used stationary band saw)


I used the band clamps that came with the kit to hold the sections together during mock up. Every joint except for the connections in and out of the mufflers will be welded. I am clamping the muffs in case I don't like the tone!


Looks good so far...but....


When I got back from the welding shop the right side didn't fit exactly as I had it mocked up. Kid you not, fitting between two fixed points is difficult! Did the RH head pipe over and it fit perfectly.


Discovered that 3" masking tape makes a very accurate "clamp" for mock up!


Much better  :)


There are clamps on the x-pipe here that were later removed and the joints were welded.


Moving on to the rear of the x-pipe

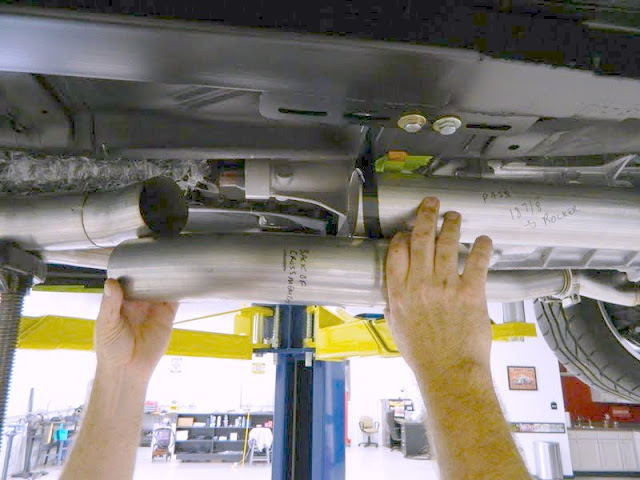
Made these brackets with studs for the muffler hangers. The hangers are from the kit.


Welded the hanger bracket to the body


The piece in the muffler was cut from one of the kit pieces. The piece on the rear of the x-pipe was one of the pieces I bought separately.


Removed as an assembly for welding


Front section complete. Fits like a glove and tucks up tight. Before final assembly I will brush all of the welds.