A journey through the process of turning an ordinary classic car into a modern, pro-touring machine - all of today's amenities and Vette-like handling.
Tuesday, December 4, 2012
Mock-Up: Radiator (November 14, 2012)
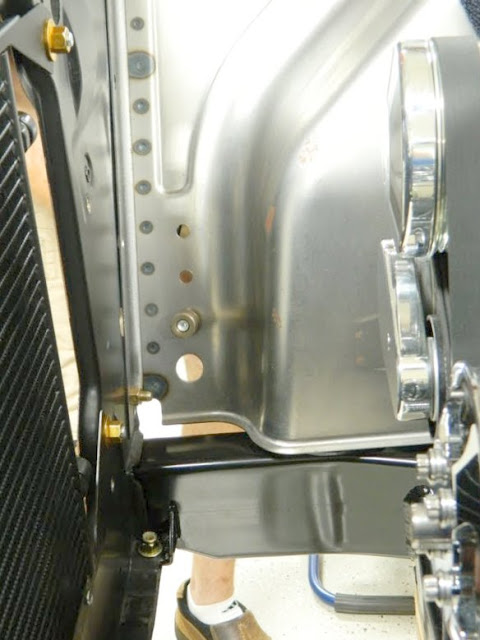
Today we received the Entropy radiator module. Installation was pretty straight forward. There are 2 brackets, 1 for each side that bolt to the original radiator mounting holes in the core support.
The cut-out portion of the core support is for a future project, cold air intake box.
Mock-Up: Fuel Pump Control Mount (November 11, 2012)
This will be a mount for the Vapor Worx PWM fuel pump control system. It will be located in the trunk on the driver's side, just forward of the hinge support. This seems to be a good location, as it's close to the fuel pump and the battery, which is trunk mounted. There are 3 components, the PWM module, fuel pressure signal conditioner and a fuse. Other than initial setup, there should be no reason to need to access this.
I started with a poster board mock-up then transferred it to a piece of 16 ga. steel.
Test fit
Welded in place
Primed
Friday, November 30, 2012
New Trans Crossmember (November 6 - 8, 2012)
In preparation for fabricating the exhaust, I decided to build a new transmission crossmember so the exhaust system could tuck up tighter. Originally I modified the "brand K" crossmember from the previous owner's TKO 5-speed swap, but it hung too low which means the exhaust would of been too low. I used the same basic principle, 1 1/2" x 3" c-channel. Good thing was I had already figured appropriate driveline angle, so it was just a matter of recreating with more acute angles. The original was used 30 degree angles. I'm going back with 60 degrees.
Pieces fitted and ready to weld. "Brand K" vs. new design.
Tacked in place
Test fit
Welding it out
Making it pretty
I trimmed this edge on the front to allow the crossmember to slide in without removing the mount from the transmission or having to remove the entire shifter assembly so the transmission could go up high enough to slide the crossmember out.
Monday, November 12, 2012
Time Off to Install a 2-post Lift (November 1 - 5, 2012)
Borrowed a few days from the car build to install a new shop tool. (To see more of our 15-month shop renovation, check out our thread on Garage Journal). Decided to make the investment for a lift. Just makes the job too easy. Money well spent! I would advise anyone who has the space to get one. Went with a Bend-Pak 9,000 lb. asymmetrical model.
Taking the car off the blocks.
First time it's on the ground since we've started. Extremely happy with the stance!
Much easier than a floor jack!
Mock-Up: A/C Condenser & Front Bulkhead Fittings (October 15 - 16, 2012)
Today I mocked-up the A/C condenser. Vintage Air did their homework here, as it fit perfectly. No modifications required. It attaches to the core support using the same bolt holes that will hold the radiator in.
Here I am punching holes for the forward bulkhead fittings. I will run the A/C lines and heater hoses inside the fender well. They will exit here to the A/C compressor and water pump.
View from backside of fender well.
Also, today we received our 3" exhaust system from Stainless Works. This setup is intended for use with the Stainless Works LS headers. I am running the DSE headers, so I'll have to modify them to connect. Also the rear will have to be modified as well to clear the Quadralink rear suspension.
Sunday, November 11, 2012
Mock-Up: Gas Tank (October 14, 2012)
Today I mounted the Rick's stainless steel gas tank. I modified the forward portion of the mounting straps. I didn't like the way the straps did not hug the front of the tank. I cut off the loop and added these angles. I then added studs for these to attach to, which will allow the straps to stay tight against the front of the tank.
The long studs in the back are for mock-up only. Appropriate length studs will be used for final assembly.
Here you can see the modified strap mounting.
Forming the straps to fit the tank.
Subscribe to:
Comments (Atom)


