The original package tray had been poorly hacked in a previous life to accommodate 6 x 9's. After surveying what would be required to fix it and in respect of what I had planned to go in here, I decided to remove pretty much the whole tray.
View of the original from below.
Marked it and cut from below with an air saw.
Center portion removed.
This is the portion I removed. Looks like the 6 x 9's must have been shaped like eggs!
Playing around with the layout using the original deck as a pattern. Everything will be located below the deck surface and the deck will be wrapped with heavy speaker grille cloth for a stealthy appearance.
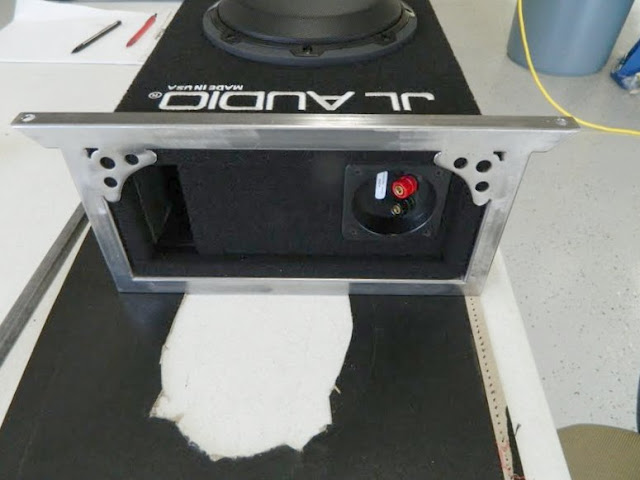
Next up is fabricating mounts for the JL Audio enclosed sub. I used 3/4" square tubing. Made a frame to slip over each end of the enclosure. These will attach to two pieces of tubing that will be welded into place on the car.
I used gusset brackets as stops to keep the enclosure from moving left to right.
These are the braces that will be welded to the underside of where the original package tray was located. I will put in rivet nuts for the enclosure brackets to screw into.
Sub enclosure in place.
View from below.
Next up are mounts for the JBL 5 channel amp. I used more 3/4" tubing for these. The amp will sit below the sub at about a 15 degree incline.
Rivet nuts for the amp to attach.
Amp in place. Will install rivet nuts in the floor for the brackets to attach to.
Not bad! All of these mountings will be powder coated.
Next up was the battery mount. I located it on the passenger side next to the amp. This is a simple billet Optima mount. It will attach to the floor with more rivet nuts. I may powdercoat this to match the audio mounts.
Next is mounting the battery disconnect switch. I wanted to locate it near the battery, make it convienient yet somewhat out of sight. This is the mounting bracket.

Location is at the right rear of the package tray. It is low enough to easily access but out of plain sight. The bracket will be powder coated.
Last item to locate in the trunk area is the IImuch Fabrication fuel tank vent. I located this on the left side near the front of the trunk. Out of the way and works well from below for plumbing.
Next up is the actual package tray. It is made from .125 aluminum. It will have a ring to seal to the sub enclosure as well as rings for mounting the Focal 6 1/4" 2 way speakers. When complete the aluminum will be powder coated and wrapped with heavy black speaker grill cloth. All of the speakers will be below the deck.
Cutting the rings from MDF with a router and a circle jig.
Ring for the 2 ways.
Cutting the ring for sealing the sub to the package tray.
Mocking up the rings on the package tray.
Setting up to cut the speaker holes.
I cut the holes with the router using a bit intended for shower door fabrication. Cut like butter!
Mocking up the rings to the package tray.
I am using countersunk screws to mount the rings to the pacakge tray.
I will run the router with a 45 degree chamfer bit to match the rings to the package tray perfectly.
The package tray with the rings and speakers installed.


No comments:
Post a Comment