Saturday, September 22, 2012

Mock-Up: A/C Evaporator (September 8 - 9, 2012)


Today I mounted the A/C evaporator under the dash.

The Vintage Air evaporator uses 2 of the holes in the firewall that the factory heater box used.  I wanted to make my own brackets with studs, as I didn't want any screw heads showing on the engine side of the firewall.  Here we have the evaporator blocked up with a box to see what kind of space it took up.  


Since we are using the DSE select-a-speed wipers, we needed to slightly relocate the evaporator assembly to clear the rod that runs from the wiper motor to the passenger side wiper arm.  With factory wipers, this wouldn't be necessary, as it's designed to clear the rod.  Since the DSE wiper motor is on the inside of the car instead of the outside, we had to make some adjustments.  These are the brackets I made the space the evaporator away from the firewall slightly.


Here the brackets are held in place with screws through the original heater box holes in the firewall.  


Welding them in place.


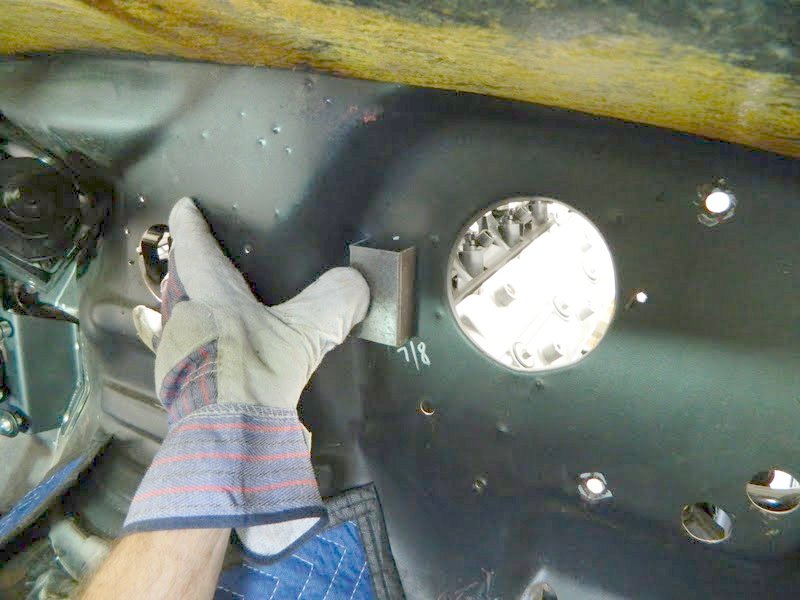
You can't see in this picture, but I removed the screws and replaced them with socket head cap screws (allen screws), which fit through the hole in the firewall.  I used red loctite on these so they're not coming out.  Later I'll weld up the holes in the firewall. 


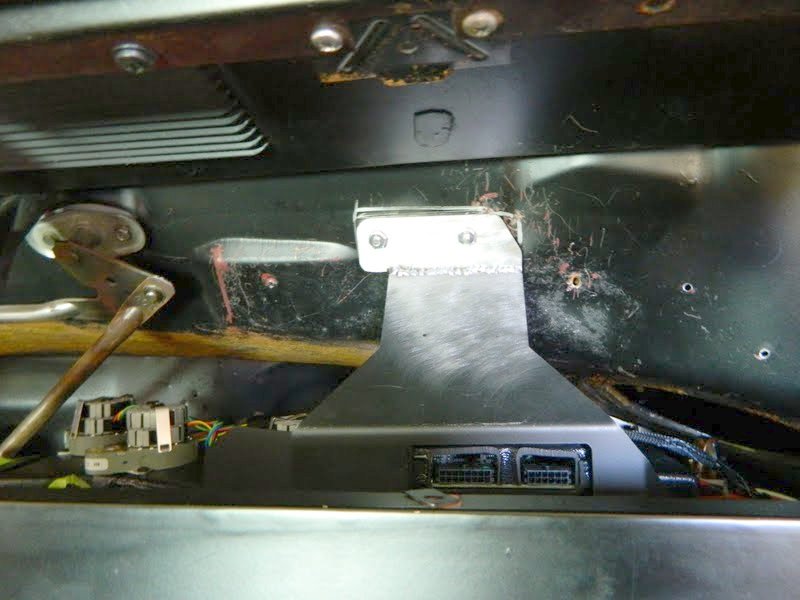
This is the Vintage Air bracket for the top of the evaporator.  Since we moved the unit out from the firewall slightly at an angle, I had to reposition the tab on the top of the bracket (in this picture, I already cut off the tab).  You can also see the studs that the bracket will attach to.  The Vintage Air instructions have you using self drilling screws, which protrude into the cowl area.  I didn't want to see screws through the cowl grille, so I used 10-32 allen head screws into a 3/16" plate on the inside.  I used neoprene washers under the heads of the screws for a seal.  


Here's the modified upper bracket. 


Evaporator unit bolted in place.


Mock-Up: Gas Pedal Mount (September 4 - 7, 2012)


Today I fabricated the gas pedal mount.

Started with a paper template.  There are 3 mounting holes for the pedal assembly and a clearance hole for a portion of the pedal assembly that protruded beyond the mounting tabs.  I plan to attach to the firewall on the right side and to my firewall reinforcement plate on the left side.  


Transferred the template to the 14 ga. metal and marked it where it needed to be bent.  


Here's the bent bracket.  Fortunately for me, I have a sheet metal brake at work.  


Pedal assembly attached


Test fit


Whoops!  Good thing I decided to test fit the DSE select-a-speed wiper motor.  I had to make a slight adjustment for clearance.


I used 1/4-20 press nuts for the pedal assembly attachment.  


For the right side, I plug welded a piece of 3/16" steel to the tunnel so that I could tap 1/4-20 holes.  The left side hole will attach to the firewall reinforcement.  Here I have just tapped the plate but when I remove it, I will add another press nut.  


Finished product


Mock-Up: DSE Headers (August 27, 2012)


Today I put the headers on the engine.  These are the D$E stainless headers.  Quite pricey but after an extensive search, I didn't find any direct fit alternatives.  Having now installed them, I have no regrets about the cost.  They are truly works of art!  Only wish I could weld this well.  Fit perfectly.  Space is an absolute premium.  I am discovering just how narrow a Chevy II really is.  If you are considering a DSE front clip, spend the bucks on the headers.  You won't be disappointed.


Mock-Up: Back Seat Frame Modifications (August 26, 2012)


Today I modified the back seat frame in order to clear the DSE deep tubs.

This is the lower portion of the rear seat, which does not need to be modified, but I'm pulling the upholstery and foam off since it will be redone.


This is the back portion of the rear seat.  The right and left sides have to be modified to make room for the tubs.  The part I'm holding gets cut off on each end and inverted.  


Here's the piece inverted.  You can see there's more space on the side, which is where the tub was interfering.  If you look at the top portion of the picture, you can see that the frame work also needs to be modified for clearance.  


Basically the same process - cut the offset portion out and invert it.  


Test fit


Since I had to rebuild the "shoeboxes" that were part of the structure behind the seat, I ended up modifying how the lower portion of the seat back attaches.  Simple fix - added on a tab, which will be attached to the "shoebox."  


Here you can see the tabs.


Here is the finished product.  Did my own thing, as the direction included from DSE didn't really seem to apply to a '67.  


Mock-Up: Clutch & Brake Pedal Mounting (August 20, 2012)


Today I mounted the brake and clutch pedals.


The forward part of the brake/clutch pedal mount attaches to the firewall in the original location, except that the reinforcement I made in the previous post is sandwiched between the firewall and the pedal mount.  The clutch master cylinder will also attach to the reinforcement/firewall.  


Here's the interior view of the clutch master cylinder attachment.  I used a shoulder bolt to attach the push rod to the clutch pedal.  I have 2 holes drilled in the clutch pedal, one will give a 5:1 ratio and the other will give a 6:1.  


The driveshaft arrived today so we did a test fit.


Fits perfect!